This is a script that will help you set up poses in your furniture. It builds a menu of all your poses, helps you edit that menu, move each of the poses around on the furniture, save the resulting menu and set up your furniture to sell to your customers. No pose-balls are used, not even a helper prim any more (that was replaced by the HUD in version 2.0). This even works on single-prim sculpt or mesh furniture. As few as one click and you are sitting in the chair.
The latest additions to the documentation will always be appear here first. Tutorials to help you learn how to use this posing system can be found below. You can also see the posing system live in-world at several locations. Sample furniture with a demo version of the poser will let you try out all the features. The Kitely Marketplace can export the MPS to OSGrid or any other hypergrid enabled grid! Check out http://magic.kayaker.net to get links to all these places. NOTE that the MPS scripts will only work on Open Simulator version 0.8 or better! They work in Avination, but the "unsit pos" feature does not work there. If you like the Magic Pose System, you might also like my Magic Color HUD.
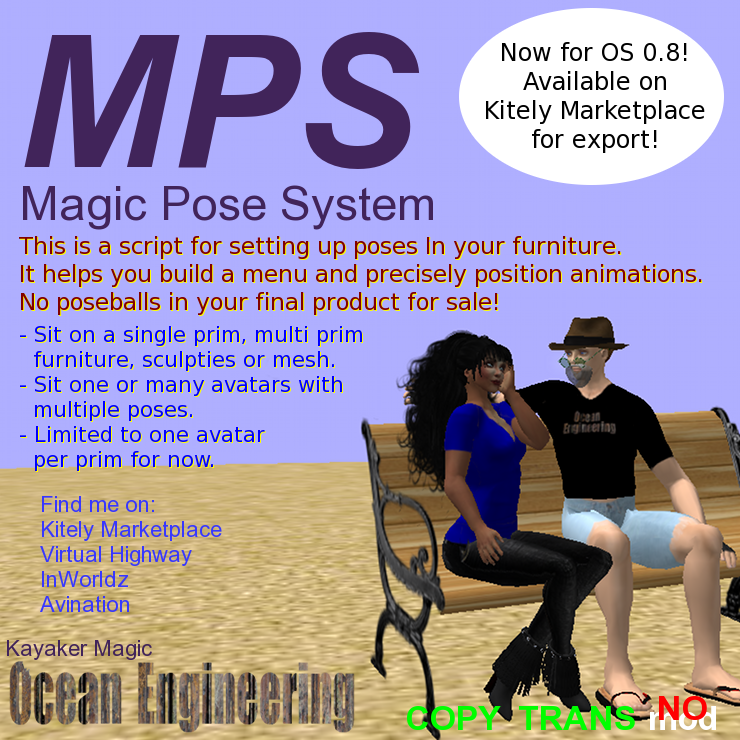
August 10th 2014: Some important bugs were fixed in Open Simulator version 0.8 that allow the script to work correctly in Vanilla OpenSim systems for the first time. Avatars can move from one pose to the next by just clicking on the menu. I am also selling the MPS on the Kitely Marketplace for export. This means you can buy my posing system there for the OSGrid and a growing number of other OpenSim based grids!
Once you change the permission to noTRANS or noCOPY, you may distribute copies of the MPS poser script in the inventory of your products. The script is copyrighted and is sent to you noMOD so you cannot see the source. Attempting to break the protection or change the creator of these scripts is a violation of my copyright. To quote the MC++ CS Gangsta Rap song:
"Protecting messages to make my pay.
If you hack me, you're guilty under DMCA!"
If you are just curious about advanced animation techniques on Open Simulator, track me down in-world. I love talking about scripting and sharing with my friends.
The MPS HUD is NO TRANS, it is for you to use to edit furniture. You never ship that with your final products.
In "Menu 1ST" mode, left-click on the chair, the dialog appears with the list of all poses, select one. Then left-click on the chair a second time, this time the "seat" icon appeared as you clicked and you land in the pose that you chose.
| HELP | Click on the top bar of the HUD where it says "MPS Magic Pose System" to get a note card with a copy of this text to help you remember how to use it. |
| CONNECT | This connects the HUD to one of the seats in a nearby furniture build. There is a short delay while a search is done for all nearby copies of the MPS poser script. Only seats in builds within a 10 meter radius will be found. A dialog appears with the nearest 12 seats. (If there is only one nearby seat, the HUD connects to it automatically and does not bring up the dialog). Click on the seat in the dialog you want to edit, your HUD will now edit that seat. For this to work unambiguously, you will have to give every seat prim in your build a unique name. Only the first 12 characters of the prim names appear in the dialog, so be brief! You can wear several copies of the HUD at once and connect each HUD to a different seat. This will allow, for example, editing both halves of a couples pose at once. You can also rez the HUD as a freestanding object, make it larger and it will work
You can press the CONNECT button at any time to break a connection with a seat and re-connect to a different seat. If you detach the HUD, delete it, remove the furniture, or fly into another region, this will also break the connection. There is a delay of several seconds after one of these events before you can connect again, so if a seat does not appear in the connect dialog, wait a few seconds and try again. |
| SAVE | This button dumps a table out to local chat. You must cut that out and paste it into the "MPS params" notecard in the inventory of the chair. Failure to SAVE, cut and paste will loose all of your work! The poses are only saved in memory before this and may be lost if the chair is re-rezzed, reset or the sim is reset. Depending on your viewer, you may need to edit this table to rename poses. Details of the format of this table are given below. |
| NOTE: Only on InWorldz, the SAVE button now re-writes the MPS params notecard for you! The above steps are no longer necessary there. | |
| NOTE: When editing multiple poses in one piece of furniture, make sure you paste the table into the "MPS params" file in the correct prim! It is easy to select the wrong one and over-write (destroy) work that you did before! If this happens to you, search back through your local chat history for the lost table data, it may still be there to save your lost work. | |
| RENAME | Brings up a text box and lets you rename the currently selected pose. This changes the name in the dialog, the animation is not renamed, just associated with this name. Pose names must be short, only the first 12 character names or so will fit in a menu button. |
| NOTE: Some viewers cannot do "Text Boxes" and rename will not work. Instead a dialog box with one button named "!!TextBox!!" appears. (Don't press that, press 'ignore' to make it go away). If this happens to you, then you must learn to edit the table in the "MPS params" notecard. See below for the format of this table. | |
| DELETE | This deletes a pose from the menu. The animation file is not deleted, just orphaned. If you want to get this pose back, you can use FIND to find it, but you will have to position and rename it again. |
| POSES | Brings up the menu of poses again so you can switch to editing a different one. |
| SYNC | Connects poses on several seats of the same build. Whenever one pose is selected, the connected seat will switch to the corresponding pose. It does not matter who sits first, or if they are both already seated. If one avatar changes to a synchronized pose, the other avatar will be moved and animated into the new position.
To use this you must have two copies of the HUD on your screen. This requires having two copies of the HUD in your inventory and attaching them to different slots on the display. Then use the two HUDs to select the two poses that are to be synchronized. Press the SYNC button on both HUDs to synchronize those poses. The word SYNC will appear in green floating text above each HUD between the two button presses. You should immediately press the second SYNC button. Doing anything else, like switching to another pose, will abort the sync operation and you will have to start over. You can have seats that are not synchronized. If one avatar selects a non-sync seat, they will leave the other avatar behind in the last pose they had. To remove synchronization from a pair of poses, select the pose and press SYNC twice on the same HUD. Or press SYNC once, and then change any pose, this will break the connection. You can synchronize more than two seats together. You need a separate HUD on your screen for each seat. Use the HUDs to set up all the poses, then press the SYNC button on each HUD in turn. When three or more poses have been synced together, clicking twice on the SYNC button only removes that seat from the set. You will have to go to each HUD in turn and click SYNC twice on each to remove all traces of a multiple-sync pose. There is a way to create multiple-sync poses with only two HUDs on-screen: Pick one of the HUDs to be the master and always click SYNC on that one first. Use it to sync to each seat in sequence. Using the CONNECT button to switch the slave HUD to a new pose, then pressing SYNC first on the master, then on the slave HUD. Repeat until all the poses have been linked to the one in the master. |
| FIND | Searches inventory for new animations. This allows you to find deleted poses or recently added animations. The first time the "MPS poser" script is dropped into inventory it does a search for all animations and builds the first menu. Once a "MPS params" file is created, this automatic search is not done again. If you add new animations to the inventory of the chair, you must press FIND to get them into the menu and start editing them. |
| SWAPMENU | This button allows you to organize your poses in the menu. First you press POSE to select one pose in the menu, then you press SWAPMENU, then you press a second pose. The two poses swap positions in the menu. You can use >>MORE>> to swap poses that are on different pages. |
| DEFAULT | This button allows you to set the default pose that will be used if someone sits on your chair without going through the menu. Select a pose with the POSE button and hit DEFAULT. |
| MENU 1st SIT 1st | One button switches between two modes. Note that the current mode is displayed in the button, click to change away from that mode. |
| SIT 1st | In this mode, the first click on the chair sits the avatar immediately in the default pose. This is ideal for simple chairs, you can always click a second time to bring up the menu and change your pose. If the root prim has the MPS in it, these set this mode for all other seats. If there is no seat in the root prim, then each seat in the build can separately be menu or sit 1st. |
| MENU 1st | This is the default behavior, the first click brings up a menu of poses, the second click on the chair sits the avatar in the chosen pose. This is ideal for a sex bed, the first click brings up the menu of poses and lets you see what your are getting yourself into before you sit! |
| ADJUSTABLE NO ADJUST | One button switches between two modes. Note that the current mode is displayed in the button, click it to change away from the mode you see. Adjustable mode means that after an avatar sits, they can adjust their position with the arrow control keys. In "no adjust" mode, the seat is not adjustable and the controls are freed up for other scripts to use. Each seat in a build can separately be set adjustable or not. |
| UNSIT POS | This button allows you to specify where the avatar will go when they stand up from the seat. To use this, you must sit on the chair, move the avatar to the desired location, then press UNSIT POS. This will, unfortunately, loose whatever location and rotation one of the poses had! Either do this unsit setup before adjusting all the poses, move the avatar back to the right place after UNSIT POS, or add an extra animation to the inventory for this procedure. A standing animation would be best for this anyway. Once the unsit position is set, you can DELETE the extra standing pose from the menu. |
You can change the pose names that appear in each line, but you should not change anything else unless you know what you are doing! For example, you can change the animation name field if you also rename the animation in inventory to match, or drag in a new animation that matches the name.
Below is a sample "MPS params" file. Each line starts with a time and the name of the prim followed by a colon. These are ignored by the pose system.
[01:35] Cushion Left: pose|1|Curl right|my_sit_RcurlX|x|<0.126037,-0.021919,0.137973>|<-0.264004,-0.515455,0.311807,0.753249>
[01:35] Cushion Left: pose|1|Right arm|my_sit_Rarm|x|<0.210054,-0.062613,0.139401>|<-0.194462,-0.545507,0.210814,0.787506>
[01:35] Cushion Left: pose|1|Curl left|my_sit_LcurlX|x|<0.210054,-0.062613,0.139401>|<0.194462,0.545507,-0.210814,-0.787506>
[01:35] Cushion Left: pose|1|Sit back|my_sit_backX|x|<0.140832,-0.093584,0.196869>|<-0.264004,-0.515455,0.311807,0.753249>
[01:35] Cushion Left: default|my_sit_backX|menu 1st|adjustable
[01:35] Cushion Left: unsit|<1.00000, 0.00000, 1.00000>|<0.00000, 0.00000, 0.00000, 1.00000>
This particular menu will have poses named "Curl right", "Right arm", "Curl left" and "Sit back". You can change these at any time and after you save the notecard back to the furniture inventory, they will appear in the next menu. The animation files that each of these poses run are the ones named "my_sit_RcurlX", "my_sit_Rarm", "my_sit_Lcurl", and "my_sit_backX".
You can re-arrange the order of the pose lines, but the poses appear in the menu in a strange order: They "flow" from left to right, bottom to top. The first one in the notecard appears in the lower left of the dialog. The second and third appear to the right of that one. The 4th 5th and 6th appear on the second line FROM THE BOTTOM of the dialog. The 7th 8th and 9th appear on the third line FROM THE BOTTOM and the 10th 11th and 12th appear on the top line of the dialog. That is the way Linden Labs did it, and everyone has had to do it that way.
The syncronized fields are labels that connect two parameter files together in two seats. To connect one pose in one NC to a different pose in another NC, just put a unique identifier there. For example, in the first line you could replace the “x” with “A”, and then in a copy of this file replace the “x” in the third line with “A”. This would synchronize “curl right” with “curl left” and make the two avatars always lean into each other.
When you use the HUD to fill in the sync field, it uses animation names in these locations. This is only done to assure that the names are unique. You should not assume that these names refer to the animation that will be played.
The 2nd to last line in the "MPS params" file is the default line. It has the name of the default animation and several mode settings. The second parameter (after 'default') separated by a '|' is the name of the default animation. this selects which animation will be used if someone right-click-sits or sits in 'sit 1st' mode without bringing up the menu first. This parameter has the name of an animation, not the name of a pose. It acquires the position and rotation of that animation from the lines above. The second parameter is where the 'menu or sit 1st' mode is stored. The third parameter is where the 'adjustable or no adjust' parameter is stored.
The last line is the position and rotation of the unsit position, where the avatar will go when she stands up from the chair. This example is one meter out and one meter up (in the local co-ordinates of the seat prim) and zero rotation.