Check out my demo videos of these surfboards here or there. Come try one out and ride the waves yourself at one of my stores. You can find links to all my locations here.
| Keyboard Key | Function |
|---|---|
| Fwd Arrow or 'w' | causes your avatar to paddle and the board to accelerate forward. (You are always lying prone while paddling). |
| Back Arrow or 's' | causes your avatar to stand up on the board. (If you are already standing, this causes you to crouch on the board) |
| Right Arrow or 'd' | causes your board to turn right at a normal rate. |
| Left Arrow or 'a' | turns your board to the left at a normal rate. |
| Shift Right Arrow or 'D' | makes the board turn faster to the right. |
| Shift Left Arrow or 'A' | turns the board at a faster rate to the left. |
| Page-Up or 'e' | and your avatar will do a back-flip on the board! |
| Page-Down or 'c' | and your avatar will kneel on the board. |
When you first sit on the board, you land in seated on the board with your legs dangling in the water. Paddling forward you lie prone on the board. To stand up, you press the back-arrow key. (Surfboards rarely go backwards so I used this key for stand up). Your avatar will rotate left and right as you steer. Whenever you paddle, you will lay back down prone. To get back into the seated position, wait until your board slows down almost to a stop and tap the left or right arrow keys.
If you jump off the surfboard while it is on the water, by default it will return to where you sat on it. In UNSIT.DROP mode (see the dialog modes) it will continue floating. If a wave comes by the surfboard may be washed ashore or pulled back out into the impact zone. It may bog down the SIM to leave boards floating like this. To decrease the drain on the SIM, move the board onto the beach above the waterline, or take it back into inventory to completely remove the chance of lag.| DYN CAM/FREE CAM | One button switches between two camera modes, how you view your avatar while paddling. The meaning of these two modes is: |
| DYN CAM | This mode has the camera following behind you avatar as you paddle but swings left and right as you turn to watch yourself from the sides. |
| FREE CAM | In this mode you can control the camera angle yourself. This is a good mode for setting up camera angles for surfing videos. You can fix the camera to follow you through the tube of a wave, for example. The standard viewer camera controls will allow you to control the camera while surfing: Alt-Right-Arrow will rotate your camera right (counter clockwise) around your avatar. Alt-Left-Arrow will rotate the view left around your avatar. Rolling the mouse-wheel will zoom closer or farther from your avatar. |
| PRIVATE/FREE RIDE | One button switches between two modes. In private mode only the owner of the board may ride it. In 'free ride' mode you can leave the surfboard lying on the beach and anyone can jump on it and ride. |
| TEXT HELP/NO HELP | One button switches between two display modes. In 'text help' mode, a short message Sit here to surf is displayed above the surfboard when it is unoccupied on the beach. This same message is displayed in green when you first rez the surfboard, but disappears when you sit on it and never comes back in no text mode. |
| SPEED/NO SPEED | One button switches between two display modes while surfing. In 'speed' mode your speed in m/s and the name of the nearest wave current or rock is displayed in floating text above the surfboard. |
| PARCEL/REGION/SAFE SIMS/GRID | One button switches between different modes that determine where you can surf. Depending on the capabilities of your grid, not all of these modes will work for you: |
| PARCEL | The board will stay inside the parcel it is currently in. It will stop at the borders and you will have to turn it to face in an allowed direction before it moves again. |
| REGION | In this mode the board will move inside the current region wherever property permissions are friendly. It will cross into parcels that have RUN SCRIPTS and OBJECT ENTRY and stop at the borders of parcels that do not have both of these permissions. If you are in a var region, the board will automatically detect the size. |
| SAFE SIMS | In this mode the board will cross borders into a list of known safe SIMs. You can edit a list of SIMs using the Surfboard Remote described below. |
| GRID | Except on OpenSim 0.8 or below, this mode allows you to cross SIM boundaries and travel anywhere in the grid! While inside a SIM, this mode is similar to REGION and goes anywhere friendly. Note that there is no way for the board to detect friendly permissions on the other side of a SIM boundary, so it is possible that it will freeze up after crossing a boundary into an unfriendly SIM. |
| WAVES | This button brings up a separate menu of options for diagnosing river and wave setups. These commands are described later below. |
| POSITION | This button brings up a new dialog with buttons for adjusting the position of the avatar on the surfboard, and the depth that the surfboard sits in the water. The commands in this dialog are described later below. |
| PHYSICS | If your surfboard has this button, it brings up a set of physics coefficients that determines how fast a surfboard accelerates or slows down with friction from various sources. You should probably leave these in the default settings or change them very carefully. |
| HELP | Gives you a URL to this page with these instruction in it. |
| DONE | Most commands change a parameter and then immediately bring the dialog back up again to allow you to rapidly change again. When you are done, press this DONE button. (You could press IGNORE, but then you would get an annoying message 20 seconds later). |
| MAIN | If you are in the waves or position dialog, this button brings you back to this main dialog of options. |
| FIND WAVE | If your vehicle passes through waves without riding them, try this button to get it to search over again. Wait 30 seconds aand click WAVE LIST below to see if it is now finding all the waves. |
| RESET WAVES | If find wave does not work, the RESET WAVES button will clear memory and force the script to listen for all waves, rocks, currents and skywaters. This may take up to 30 seconds. |
| WAVE LIST | When you press this button, the surfboard should display a list of all the nearby waves, rocks, currents and skywaters. Next to each feature it displays a position and a timer. The position is important for arranging multiple waves. The timer is used to detect when waves are deleted so that the memory can be freed up. The amount of free memory is displayed at the top. It takes approximately 2000 bytes of memory to keep track of one wave or other feature, if this number becomes too small or the wave list fails to display, try RESET WAVES. Memory can be exhausted by deleting and rezzing waves and currents, and resetting will fix it. If the problem returns, contact Kayaker Magic. There is a way to free memory by adding more scripts. |
| QUIET/VERBOSE | For complex installations with many waves, currents and rocks, you might want to know when the surfboard locks onto each of these features. In VERBOSE mode the surfboard gives you a running commentary as waves are added and deleted. You probably only want this enabled on one of your surfboards at a time (you don't need to get the same message multiple times). |
| NO/RIVERS | The surfboards can be paddled on white water river prims, which actually are very similar to rip current prims in the ocean (at least in my simulation). If you have surfing and white water kayaking in the same region, the surfboards will waste a lot of time and server resources keeping track of rivers. Setting this button to NO RIVERS will help decrease lag on your server in this case. |
| SIT FWD +/-1 | Each press of these buttons moves the sit position of the avatar forward or backwards (-1) by one cm. You can do this with the avatar seated in any of the base positions to see the effect in real time. Each time you press one of these buttons the dialog pops back up to let you quickly make another change. When you are done, press the DONE button. |
| SIT UP +/-1 | Each press of these buttons moves the sit position of the avatar up or down (-1) by one cm on the surfboard. |
| BOARD +/-1 | Each press of these buttons moves the surfboard up or down by one cm in the water. This also determines how the board sits on the beach, in rocks, etc. |
| UNSIT DROP/HOME | One button cycles between two modes. The meaning of each mode is: |
| UNSIT DROP | In this mode, if you get off the surfboard (stand or unsit), it will stay where it is until pushed around by a wave. Perhaps it will wash ashore on its own. However, while it is drifting it uses up SIM resources so it would be best if you took the board back into inventory or moved it on to land above the water level. |
| UNSIT HOME | In this mode, when you get off the surfboard, it will jump back to the location and orientation where it was when you sat on it. This is a great way to set up demo boards, they will snap back to the beach, even standing back up on their tails, when people are done using them. |
| AUTO /MANUAL STAND | One button cycles between two modes, the meaning of the modes are: |
| MANUAL STAND | In this mode, you will remain prone or sitting on the board until you press the down-arrow button to stand up on the wave. |
| AUTO STAND | In this mode, if you are prone on the board when a wave comes under you, you will automatically stand up on the board, no key-presses are necessary. |
Try this experiment: position your surfboard sideways to a wave and let it roll under you. Notice that your surfboard tilted over but was not moved far. This is because surfboards have chines (sharp edges), keels or fins that make them preferentially move forwards and backwards. The wave can only push you around when you are pointing up or down-wave, and the strength of the push will be stronger the closer you are to pointing straight down the wave.
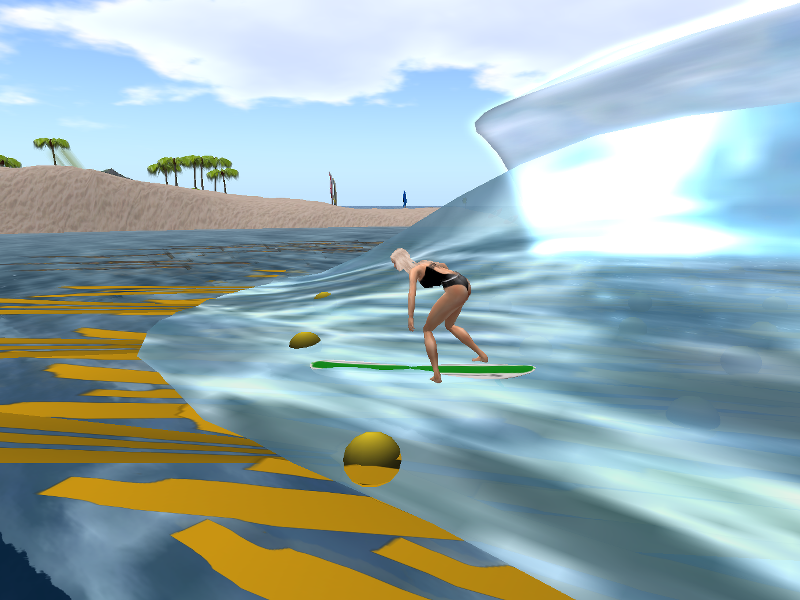
Surfing a surfboard on an Ocean Engineering Wave is easy! For your first ride, just position your surfboard in front of a wave while pointing directly towards shore. Do nothing, and the wave will gently shove your surfboard along. For a more interesting ride, turn the surfboard at angles and see how it climbs up the wave while carving sideways. Turn back down-wave early, or you will slip back over the top and loose the wave. Once you are on the back of the wave, gravity pulls you down and back. No amount of paddling can get you over the top again. With practice you can get higher up the wave, turn and paddle at the same time to keep your speed up, carve down the wave at high speed and back up. Experiment with the dynamics at the ends of the wave, the wave slopes in different directions and you may find a way to get back in front of a lost wave again.
If you rez the surfboard onto a prim above the ground (at least 100 meters or higher) it will assume you are installing it in Sky Water above the ground. At first the surfboard will assume it was rezzed at about the correct altitude and use that as the water level. It would be best if you installed Ocean Engineering Sky Water first. Sky Water communicates with the surfboard, waves and other features to make them all work well together.
reset
<976, 999, 0>
<976, 1000, 0>
<977, 999, 0>
<977, 998, 0>
<976, 998, 0>
<976, 997, 0>