
The script can generate "random" terrain in adjacent regions that match perfectly at the borders. The terrain is generated by a script, not by reading a RAW file, reciveing the terrain via email or a server. But the result is real terrain data that can be saved in a RAW file. These RAW files are your creations that you can sell if you wish. Terrain generated this way loads blindingly fast compared to a RAW file, taking seconds to fill a standard 256x256 region, under two minutes for an 8x8 var. This is also much more reliable than uploading a RAW file. You can specify control points in an NC to force mountains, lakes and islands. You can specify the roughness of the terrain at every control point to generate flat plains or gently sloping beaches surrounded by rough mountains. After the basic shape is determined by control points and randomness, you can specify other parameters to scale the land up by a factor, change the global roughness, offset the terrain up or down, rotate or flip it. These parameters can be set by typing them in chat near the prim or adding them to the .params NC in the prim.
Buy it on the Kitely Market here
This scripted object works on OpenSim 0.9 or 0.8, but it REQUIRES Owner permissions, Estate Manager and Threat Level HIGH.
Terrain Test Prim
Test for these issuea with the Terrain Test Prim which is available free in my Kitely world Fractalis. You can hypergrid there with this address: grid.kitely.com:8002:Fractalis . The full perm script from the test prim is available here. Or you can buy the Test Prim ready to go from the Kitely Market here for a small price.The Terrain Test script also checks for a common OpenSim bug: On OpenSim regions hosted on Microsoft servers, some innocuous script calls take up to 10000 times longer to run! The result of this is that it takes hours to generate terrain on a large var on a Microsoft Server, when it takes under 2 minutes on a Linux server. The Test Terrain prim will turn yellow to warn you about this if you are running on a Microsoft Server.
Fractal Terrain Step-By-Step Tutorial:
The script that generates terrain has a bewildering array of options that will take you a while to learn. This tutorial will start out with simple things you can try right away and adds more complex ideas at each step.Follow Along
You can follow along and do all the examples in this tutorial if you have a region where you don't mind changing the terrain. The easiest thing to do is to rez the Fractal Master prim in a 256x256 region and click on it (twice if it is still warning you with red floating text). It will fill your region with a new unique terrain, one that may never have been seen by anyone else ever before.
This new terrain will overwrite the previous terrain, so I hope you did this in an empty region or one where you were not fond of the previous lay of the land. You may want to move the Fractal Master prim above the ground in case the new terrain rises up around it. Or wear the prim on you hand like a magic wand.
New Random Terrain
If you don�t like the terrain you ended up with, you can type two commands in open chat near the Fractal Master prim to change things:ran //ran is the command to make up a new random seed gen //gen generates all new terrain after you make any changes.
You can just keep doing this, changing the random seed and generating new terrain until you find one that you like!
Options for Modifying Terrain
Each different random terrain can be modified greatly with several other commands in chat. The following will make the terrain rougher:rough=0.75 //make the terrain rougher (default was 0.5) gen
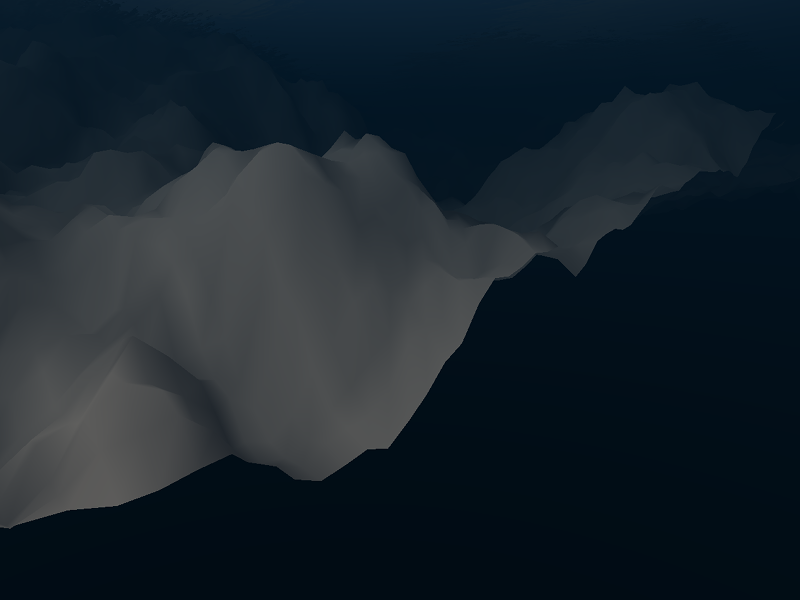
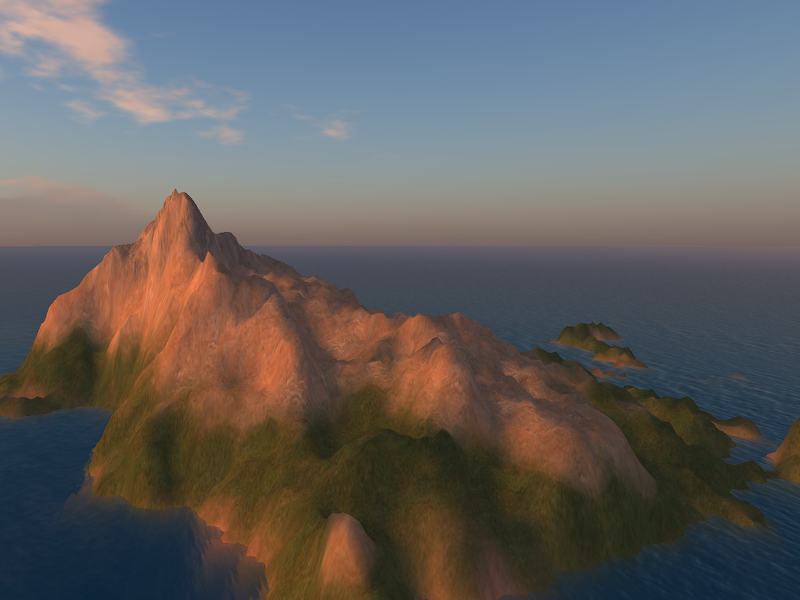 Terrain with default roughness 0.5.
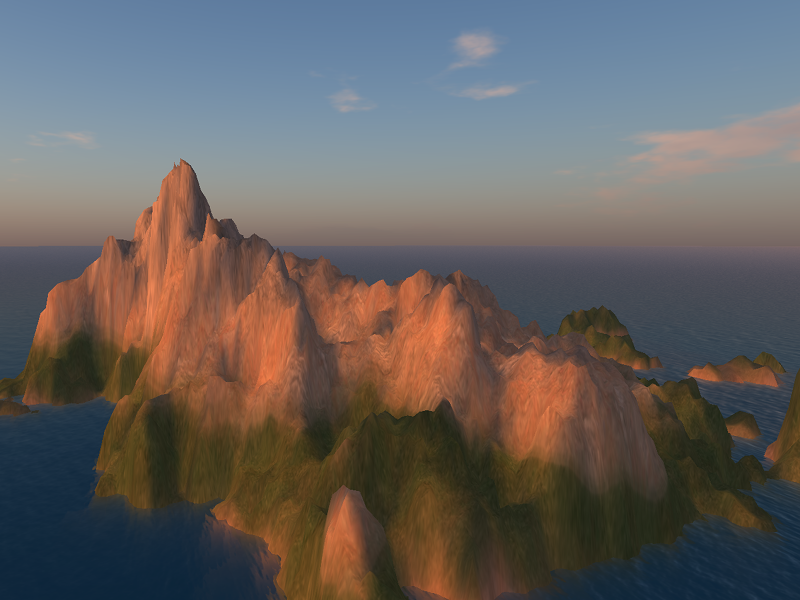 Terrain with rough=0.75.
The rough value ranges from 0.0, which produces boring flat-sided pyramids, to 1.0 which produces terrain too rough to be very useful. Note: If you typed the rough=0.75 command correctly, the script echoes back to you what it did. If you don't see this echo, then you miss-spelled something or you were too far away from the prim for it to hear you.
Similar to the rough parameter, you can make the terrain taller by multiplying it by a factor:
rough=0.5		//lets put the roughness back to the default
factor=1.5		//make all the terrain one and a half times taller
gen
You can also raise and lower the terrain with this:
factor=1.0		//lets put the factor back to the default
offset=20		//push the terrain up 10 meters
gen

The terrain can also be flipped north/south with �flipy=on�, (flips north/south), �flipx=on� (flips east/west) and �rotate=90� which can rotate the terrain in 90 degree increments.
Random Terrain Seeds
These terrains are not lost forever when you clobber them with new ones. You can �recover� a lost terrain by remembering the random seed it was generated from. This is displayed in chat whenever you start generating terrain, so if you can scroll back and find this seed number, you can reproduce that terrain again. To exactly reproduce it, you must also return the roughness, offset and factor to the previous values. Here are the seed values that I used to make the first two illustrations in this tutorial: �seed=1213840059� and �seed=1456275131�. You can type those commands in chat and reproduce the exact same terrains yourself. Try it!Terrain Control Points
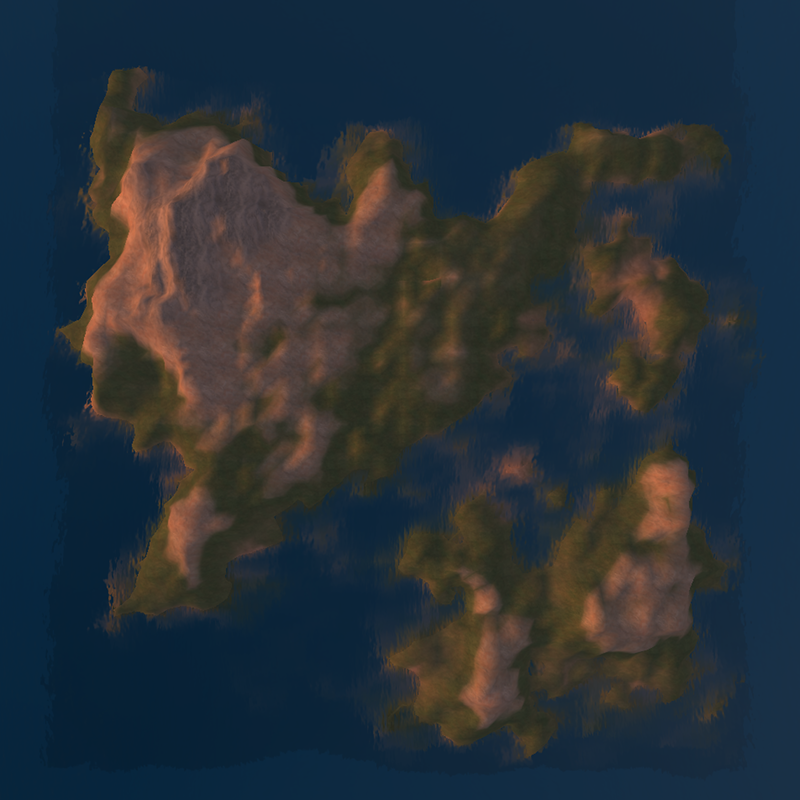
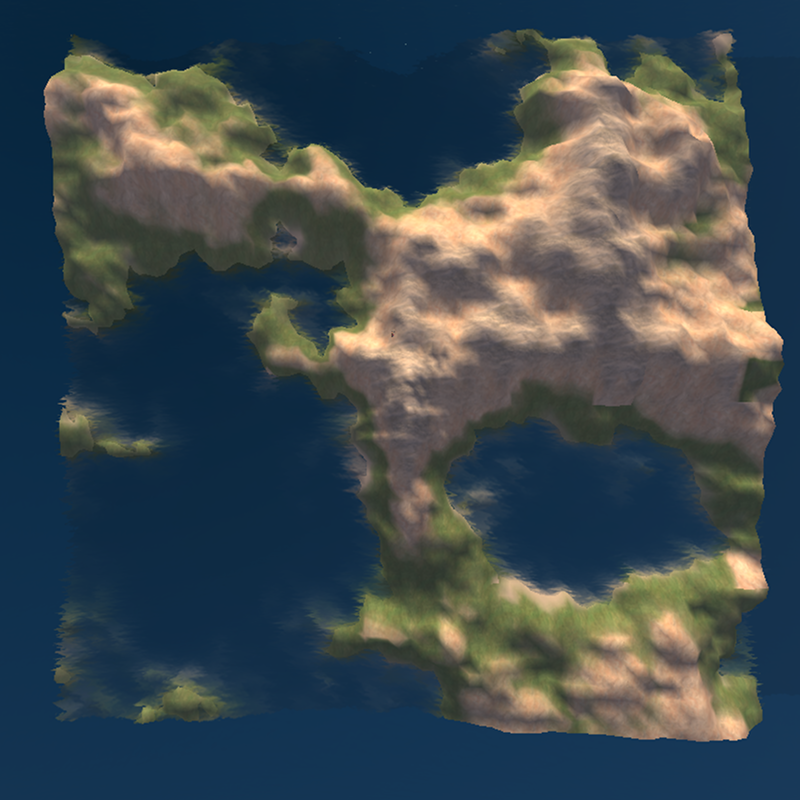
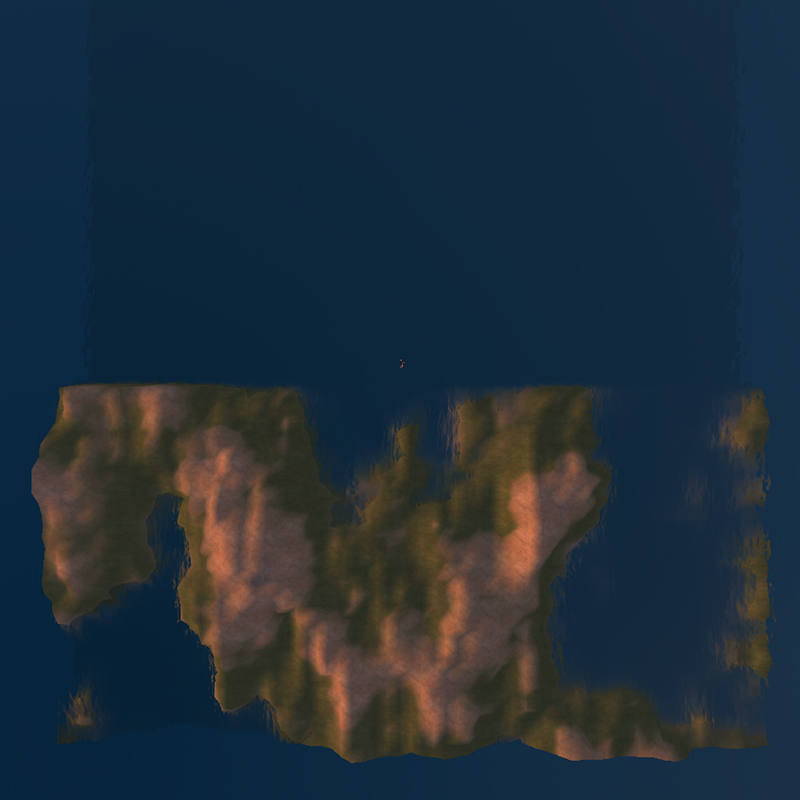
All the terrains you have seen so far in this tutorial have had the same overall look: An island with water around it, a 60 meter peak in the NW, a 40 meter peak in the SE. With different random terrain between these "control points" to fill in the details in a natural looking way. This is the default shape, these high and low points are there because they are in tables in the default .params NC. You can edit this NC and enter a new table with a different starting shape. The starting shape is two tables, one that specifies height, the other roughness. Let�s look at the default tables first and see why they produce the islands we have seen so far:sampx=5 sampy=5 samp= 00, 00, 00, 00, 00 samp= 00, 60, 30, 20, 00 samp= 00, 30, 25, 10, 00 samp= 00, 20, 10, 40, 00 samp= 00, 00, 00, 00, 00 ruf= 1, 1, 1, 1, 1 ruf= 1, 1, 1, 1, 1 ruf= 1, 1, 1, 1, 1 ruf= 1, 1, 1, 1, 1 ruf= 1, 1, 1, 1, 1
The sampx and sampy values tell Fractal Master how big the tables are. You can make these tables any size from 2x2 up. The first samp row is the height of the north edge of the terrain, the last samp line is the south edge of the terrain. The edges are set to 0 here to force the land under water and make this an island. The value of 60 makes a 60 meter peak near the NW corner of the region. The value of 40 produces a smaller peak near the SE corner. The values between these two peaks produces land that has values between the peaks, but roughness and randomness can cause the land between to sometimes dip below the water.
The ruf rows must have same number of values across and down as the samp rows.
These are roughness multipliers that should have values between 0.0 and 1.0.
They are multiplied by the roughness value set by the 'rough=' parameter sent to open chat.
The example above sets the roughness at every point to whatever the 'rough' parameter is set to.
Although the samp table forces the terrain to dive down to 0 meters at the edges,
the ruf values of 1 and the 'rough' parameter can occasionally allow the terrain at the edge to rise up above the water.
Here is a picture of that rough edge under water:
You can prevent the edge from rising too high by changing the roughness multipliers on the edges to 0.0 (or some other small value).
Below is an example of the ruf table with that change. Edit your .params NC to have these values and give it a try.
Below I show the resulting flat edge under water that results from this change.
ruf= 0,   0,   0,  0,  0
ruf= 0,   1,   1,  1,  0
ruf= 0,   1,   1,  1,  0
ruf= 0,   1,   1,  1,  0
ruf= 0,   0,   0,  0,  0

The roughness smoothly interpolates from control point to control point, so the terrain gradually becomes rougher away from the edge.
You can make the table of control points larger by setting sampx and sampy to larger values and providing more samp and ruf values.
This allows you more control over the basic shape of the land, while the fractal algorithm fills in the rest with natural looking detail.
But for our next several examples, I will make a very simple set of control points that allows the fractal algorithm to do ALL the work.
Cut out the example below and replace the default values in your .params NC. Don't forget too save the file after you make changes!
The script will inform you when it starts reading the NC and when it is done and ready to proceed. Then click the prim or type 'gen'.
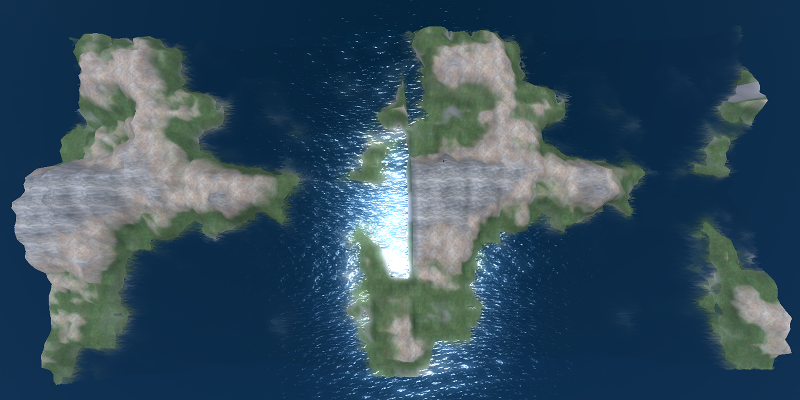
hashtype=global		//this will be explained below
sampx=2
sampy=2
samp= 20,20
samp= 20,20
ruf=   1, 1
ruf=   1, 1
And here is a terrain that results from this. The terrain randomly rises above and below 20 producing islands and lakes. If you want more land than water you can use the 'offset' parameter to push the terrain up.
Matching Terrain Across Borders
Notice that the terrain in the last picture ends with high values off the edge in several directions. If I bring the Fractal Master prim into the next region to the right and click on it there, it generates new random terrain that exactly matches the random terrain in the region next door! Here is a picture of the result: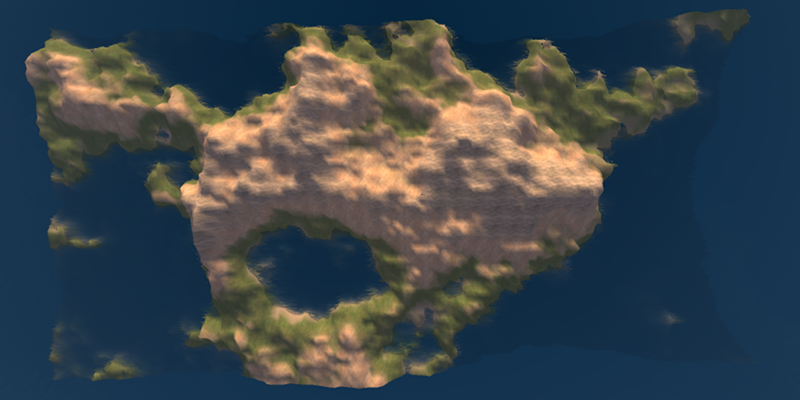
The terrain does match up perfectly across he border, but the terrain texture maps do not!
This is a "feature" of the viewer: it does not guarantee that these textures painted on the terrain will match across borders.
I cannot give you a seed value to produce this exact terrain for your grid, because the randomness is now locked onto your global grid co-ordinates. We could generate exactly the same terrain only by going to a region with the same global co-ordinate in both grids and using the same seed in both grids. But for the most part, this means your terrain will always be different than mine, and will be different in every region in your grid. If you change the seed you will have to re-gen all the regions to make them match at the edges again. Or you can enter the old seed to re-create any missing or messed up regions.
There are a few conditions that have to be met to set this up: The 'hashtype=global' parameter must be set as I did in the sample NC above. You cannot use this trick and the flip or rotate options at the same time. (The matching edges will be rotated or flipped out of alignment). You must have the same offset, roughness and multiplicative factor in all the regions. You have to have the same 'samp' and 'ruf' values on the edges. That is easily true with the simple values I am using here, since all the values are the same! You can march through a whole grid wearing the Fractal Master prim on your hand like a magic wand, bestowing matching terrain on every region! Note: You must keep the prim in a region until it says it is done. If you leave early it will stop, warn you not to do that again, and leave a mess behind. You can fix the mess by returning to the half finished region, clicking on the prim to start over and waiting for it to finish this time!
If you have a more complex set of control points, it is up to you to make the values at the edges match. To do this, you may have to create a new .params file for every region and carefully edit the edges of the tables so they match on every region edge.
Identical Terrain in Another Region
If you set the hashtype to "hashtype=local", adjacent regions will not match up. Instead, the terrain generated will be exactly the same in evey region (assuming the sample tables, roughness, etc are identical). To demonstrate this I typed into local chat:hashtype=local gen gen //after moving into the region to the right
Perspective and the slightly different texture maps makes it difficult to see that the two terrains are identical with this setting.
Parameters in Chat or Note-card
Did you notice that I have used the 'hashtype' parameter both in a NC and in open chat? All the parameters and commands that the Fractal Master understands can be typed in open chat or placed in the .params NC. Even the samp and ruf rows can be entered in open chat, but a large table is easier to edit in the NC. You can put important values you want to remember, like the seed and rough commands, in the NC to remember them and set them automatically. The .params NC is read by the script every time you edit it and save it. (This is a common mistake that I make! Don't forget to save it after you made changes!)You can over-ride the values in the .params NC by typing new values in local chat. Whatever values were entered last are the ones the script uses. So whatever values you entered last will be remembered if you carry the Fractal Master across a border. It will even remember those values when saved in inventory and rezzed again later.
Terrain in Part of a Region
In a large var region, you may only need to generate new terrain in small areas. You can do this by setting the size and offset of the area to terraform.
Type the following commands in chat to try this out, and see the result below:
outxw=128		//half as wide as an old small 256x256 region
outyw=128		//and half as tall
gen
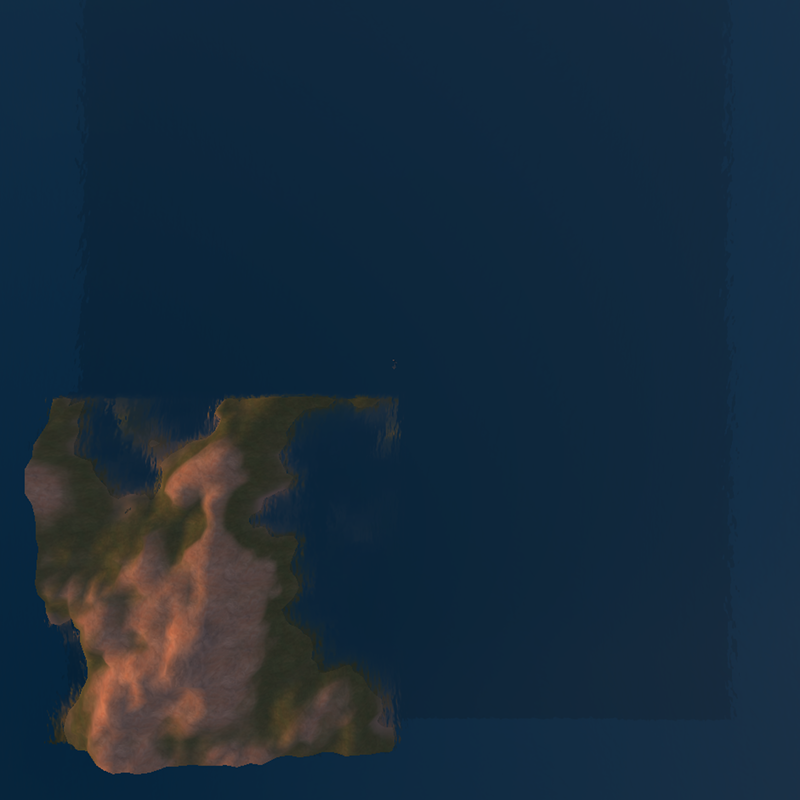
I started with the terrain all pushed down below the water, so we only see the new terrain in the SW quadrant. Next type:
outxo=128		//move over half way
outyo=128		//and up half way
gen
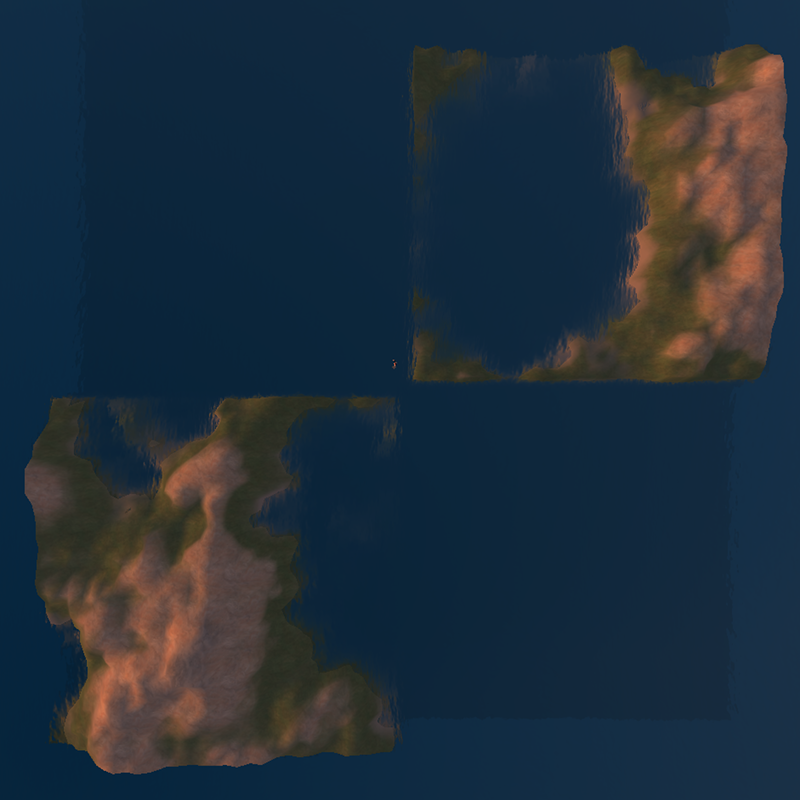
How I have filled in the NE quadrant. To fill in the SE quadrant I type:
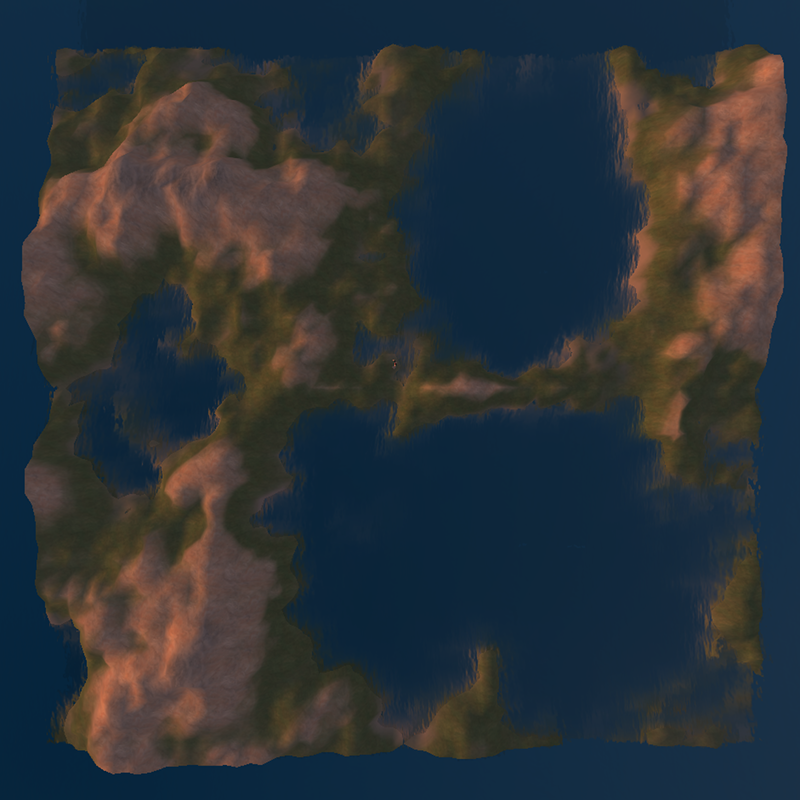
outyo=0
gen

Do you see the magic in the above picture? The new terrain matches the terrain to the west and north! If you keep the seed, offset, and other parameters the same, the terrain will always match up like this inside a single region, no matter what the hashtype is set to. One last set of commands to fill in the missing quadrant:
outxo=0
outyo=128
gen
The control points described with the samp and ruf lines in the NC are applied to the area that is terraformed. When I used the same sample data from above with two samples across and down, this resulted in a new control point at the center of the region, where all the patches met. This produces terrain different than if you used the same control points to cover a whole region.
All these examples generated square areas and started with square sample tables. This is not a restriction, you can fill any odd sized and located area inside the region. Although you will find that the terrain looks stretched if the outxw:outyw has a different aspect ratio from the sampx:sampy values. For example:
outxw=256		//output width is twice as wide
outyw=128		//as it is tall
sampx=4			//so it is best if the sample tables are also twice as wide
sampy=2			//as they are tall
samp = 20,20,20,20		//even if the samples are simple
samp = 20,20,20,20
ruf  = 1,1,1,1
ruf  = 1,1,1,1
It is becoming common to build a var region and plop a few of your old favorite 256x256 OAR files into a few of the "sub regions" in the var. But vars are so big, how are you going to fill in the rest of all that terrain? Simple! Fill in the missing areas with the Fractal Master like I just showed you above. Be careful while you do this! It is easy to set one of the offset values wrong and clobber the terrain in an area you wanted to keep! For example, a mistake that I often make is to type outy0=0 (note the two zeros, one of them was supposed to the letter �o�). One way to check for this is to watch and make sure the Fractal Master always echos back what it is doing. If you miss-spell a parameter name there will be no echo and you will know to try again.
Scaling Terrain in Large Var Regions
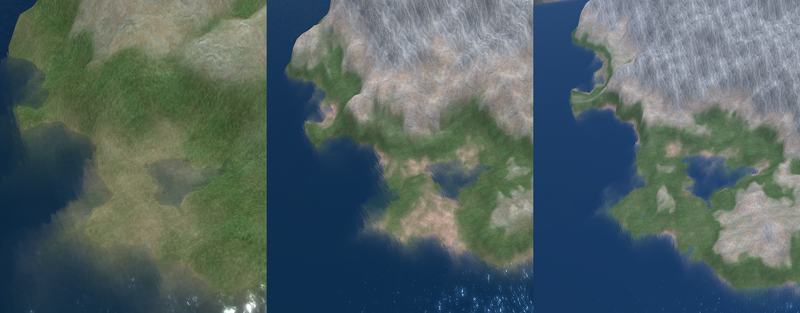
If you build terrain in a 256x256 standard region, (sometimes called a 1x1) then keeping the seed, roughness, factor, offset and control points the same when building in a var region, the terrain will not be exactly the same. It will be similar, with lakes and mountains in about the same place. But the coastline will be different. This is because the fractal roughness is proportional to the area covered. As the area becomes larger, the distance between control points becomes larger and the roughness has a larger effect. To generate exactly the same island in different sized var regions, I would have to do one of two things: Multiply the peaks to match, or decrease the roughness. I'd rather not �automatically� change parameters for you, so I allow the terrain to look a little different at different sizes.If you want exactly the same coastline you saw in the 1x1 but in a larger var region: one way is to divide the roughness factor by the var factor (2 for a 2x2 var, 3 for a 3x3 var, etc). To find out what the current settings are, type help near the prim for a list of commands that also has the current values of each parameter. For example if the roughness factor is 0.5 in a 1x1, then in a 3x3 var you would calculate 0.5/3 or rough=0.166667. This makes the land look low and gentile since the peaks still have the same height but the land is stretched out horizontally. But with the smaller roughness factor you will get the same coastline with a little more detail.
Another way to get the same coastline and also the same mountain proportions is to leave the roughness alone but increase the multiplication factor by the var multiplier. But since this scales from zero, it will push the coastline up into the air and you will have to lower it by the amount 20-20*var_ multiplier. For example, if you want the same shape in a 3x3 var, you would set factor=3 and calculate 20-20*3 or offset=-40. This has the result of making the mountains VERY TALL, but it has the same coastline from the 1x1 (with more fractal detail). The following picture shows the same cove on terrain in a 1x1, a 4x4 and an 8x8 var. The altitude of the mountains is evident by the texture used on the peaks and the decreasing band of green along the shore.
Which is the right way to increase the size of the terrain? You have to decide for yourself! Or you can just allow the coastline to fall where it may and set out to explore it!
Reference List of Parameters
| gen | After changing any of the parameters below, this command starts the process of generating new terrain. |
| stop | Stops generating terrain part way through. Usually you cannot type this fast enough to stop your terrain from being clobbered! You might use this if you realize you forgot a parameter and want to change a value and start over. |
| factor=1.0 | Multiplies the terrain by the number provided. 0.0 produces flat terrain at 0.0 (push it up with 'offset' described below). 1.0 is the default that produces the heights listed in the 'samp' lines described below. |
| rough=0.5 | Sets the fractal roughness of the terrain. 0.5 is the default. 0.0 produces flat pyramids between the sample points. 1.0 produces very rough terrain and higher values are insanely rough! |
| offset=0.0 | Offsets the terrain up or down. Default is zero, units is meters. |
| rotate=90 | Rotates the terrain in increments of 90 degrees. |
| flipx=off | If set to 'on', flips the shape of the terrain east-west. |
| flipy=off | If set to 'on', flips the shape of the terrain north-south. Flipping both x and y has the same effect as rotate=180. Rotating and flipping at the same time may not work as you want. |
| hashtype=global | If set to 'global' the randomness of the terrain is different in every region AND the edges of adjacent regions line up perfectly. If set to 'local', the terrain generated is identical (for a given seed) in every region. |
| ran | Picks a new random seed at random. Any terrain generated after this will be different than what was generated before. |
| seed=123456 | Sets the random seed of the terrain. Each seed value produces entirely different pseudo-random terrain. With this you can pick your own random terrain, or return to a previous 'random' terrain. |
| sampx=5 | Sets the width of the sample point and roughness tables. After changing this value you must enter new 'samp' and 'ruf' tables. |
| sampy=5 | Sets the height (number of rows) in the sample point and roughness tables. |
| samp=10.0,... | Enters one row of the sample point table. This must have the number of values across that is set my sampx. Values are separated by commas. There must be sampy rows in the table before you can generate terrain. |
| ruf=1.0,... | Enters one row of the roughness table. This must have the same number of values across as the samp table. There must be sampy rows in the table before you can generate terrain. |
| outxw=256 | Sets the width (east-west extent) of the terrain generated. This defaults to the width of your region. The only reason for ever changing this is to load only a small area of your region with new terrain. |
| outyw=256 | Sets the height (north-south extent) of the terrain generated. This defaults to the heigth of your region. |
| outxo=0 | Sets the east-west offset of where terrain generation starts. This defaults to 0 (the SW corner). This parameter should only be set when outxw is less than the width of your region. |
| outxo=0 | Sets the north-south offset of where terrain generation starts. This defaults to 0 (the SW corner). This parameter should only be set when outyw is less than the width of your region. |
| list | Displays a list of saved parameter settings in open chat. (Red text indicates new experimental commands, only available in future releases). |
| load=name | Loads one of the saved parammeter setting NCs. Normally the parameter NC used is named .params, this command allows you to switch to a different NC in the inventory of the prim. The new parameters are loaded and the next 'gen' command will make the terrain described in that NC. |
| name=message | Displays all the text after the equal sign in open chat. This allows you do document what your parameter NCs are doing. |
| help | This command gives you a short description of what all the parameters are and what they do. It also displays the current value of each parameter |