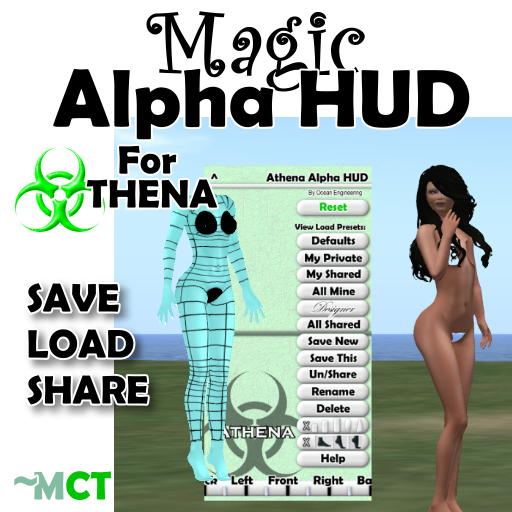
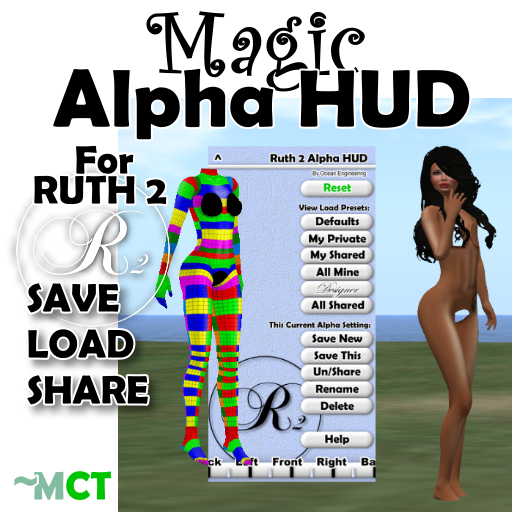
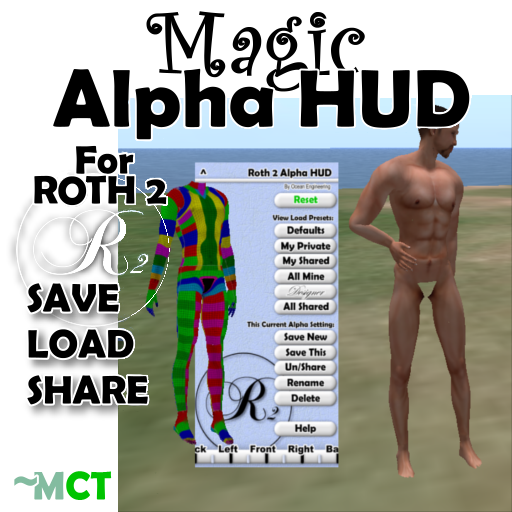
These are transparency HUDs for the Athena, Adonis, Ruth 2.0 and Roth 2.0 mesh bodies in OpenSimulator.
(The Athena HUD may work with other mesh bodies like Venus and Freya.)
These Magic Alpha HUDs work like the default ones that came with your mesh body, but with more features.
Like the default Alpha HUD for Ruth, these have a doll that you click on to make different parts of your mesh body transparent.
Typically you wear an outfit and click on the parts of the doll where your skin sticks out of the mesh clothing.
In addition there are extensive load and share options for your Transparency Sets.
No changes are needed in your mesh body, these HUDs talk to the scripts already there.
Rotate the doll to any angle: When rotating by small angles the 3D doll turns smoothly but it snaps quickly when turning larger angles.
Many angles helps you identify areas you need to make transparent, and prevents you from getting confused about which side is left or right.
Once you have a Transparency Set you like, you can save it by name in a database and load it back later.
You can mark your Sets shared so that others may us them. The instant you click 'Share' others will see it the next time they use the HUD.
This works even if your friends live on a different OpenSim grid!
Save any number of named Transparency Sets.
All Transparency Sets are loaded from dialogs:
There is a dialog for the default preset Transparency Sets (the ones that were on separate buttons in the Alpha HUD that came with your mesh body).
To try and limit the number of Sets you see at once there are buttons for only seeing your private Sets, only your shared ones, only the ones shared by a particular designer.
Also included is a "Ready2Wear" prim which can be set up to automatically load the right Transparency Sets when you wear an outfit.
| Reset | This button removes all transparency from your avatar and all the transparency indications from the doll in the HUD |
| Defaults |
Opens the dialog with a list of all the preset Transparency Sets available for your avatar.
There are more sets than will fit in the dialog, navigate through them with <MORE> and <BACK>
When you click on a named set, it is loaded into your avatar and the doll in the HUD.
The dialog pops back up so you can select another, press IGNORE when done.
Transparency Sets are additive, each one makes more areas transparent.
Use 'Reset' to start with a clean slate.
If you load the same Transparency Set twice, it will remove transparency instead of adding it.
|
| My Private |
Opens the dialog with a list of the private Transparency Sets that you have saved.
Click on one to load it, click 'Reset' first to load just this one.
|
| My Shared |
Opens the dialog with a list of all the shared Transparency Sets that you have saved.
See 'Un/Share' below for how to share your sets with others.
|
| All Mine |
Lists all your private and shared Transparency Sets in one dialog. |
| Designer |
This brings up a list of "Designers", people who have shared Transparency Sets.
When you select one of them, the dialog re-appears with a list of all the sets that person has shared.
If you are a clothing designer, you can put Transparency Sets in here for all your popular outfits.
|
| All Shared |
Lists all Transparency Sets shared by everyone.
To see only sets shared by one person, see the Designer button above
|
| Save New |
Opens up a text box for you to type the name of a new Transparency Set.
Only the first 12 letters of the first line typed into this box are used.
When you hit SUBMIT, the current transprency in the doll and avatar are saved under the new name.
You can have several with the same name, the newest one appears first: lowest and left, the older ones right and higher and in <MORE> pages.
New Transparency Sets are always private to you, to publish them for others to use press 'Un/Share' below.
|
| Save This |
The current Transparency Set is saved back into the database.
This allows you to load an old Transparency Set, make changes and save it back with 'Save This.
You can only save sets that you made yourself, not shared sets made by others.
|
| Un/Share |
This button changes the current Transparency Set between private and shared.
A new Transparency Set is always private, pressing this button changes it to shared.
Pressing this button on a shared set changes it back to private.
You can only change the shared/private status of Transparency Sets you made yourself.
You can load an old Transparency Set at any time and change its status with this button.
|
| Rename |
A text box appears, enter a 12 letter or shorter name in the first line.
When you press SUBMIT, the last Transparency Set saved or loaded is renamed.
You can only change the name of sets that you made yoursef, not shared sets made by others.
|
| Delete |
The last Transparency Set saved or loaded is deleted.
There is no way to undo this.
You can only delete Transparency Sets you made yourself.
|
| Help |
Brings you to this WEB page, you must already know that!
|
| Nails |
For Athena mesh bodies only:
Switches between transparent and 5 other nail shapes.
|
| Feet |
For Athena mesh bodies only:
Switches between transparent and 3 other foot heights.
Clicking on the feet on the doll also cycles between all these options.
Foot and nail settings are not saved to Transparency Sets.
|
LEFT
FRONT
RIGHT
BACK |
This is the rotation bar.
Clicking anywhere on the bar rotates the doll to any position in 360 degrees.
For example, clicking between FRONT and RIGHT turns the doll to a 3/4 position.
If you click an angle close to the last one, the doll rotates slowly into position.
If you click an angle far from the last one, the doll quickly switches to the new rotation.
|